
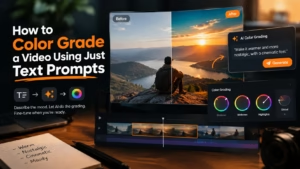
Color grading has always been one of the more intimidating parts of editing, wheels, curves, LUTs, scopes, and a whole vocabulary most people never learn because they never needed to touch it. AI color grading changes what that first step looks like: instead of dragging a wheel and guessing, you describe the mood you want, warmer, more nostalgic, a cooler and more suspenseful feel—and an editing agent grades the footage to match, while the manual tools stay available underneath for anyone who wants to fine-tune the result by hand.
This walkthrough covers exactly how that works in practice, from uploading footage to refining a grade through follow-up prompts, using invideo editor’s AI color grading tools as the example throughout. By the end, you’ll know how to get a usable, professional-looking grade without learning color theory first, and how to push further with manual controls once you have a starting point you like.
What Text-Prompt Color Grading Actually Means
It helps to separate two things that get lumped together. Color correction fixes technical problems, exposure, white balance, an unwanted color cast, so the image looks balanced and natural. Color grading is the creative layer on top of that, shaping contrast, color, and tone to create a specific mood or look.
Text-prompt grading applies AI to that second, creative layer. Instead of manually pushing wheels and curves to get a warmer, more nostalgic feel, you describe the mood you’re after, and Invideo’s AI color grading tool interprets that description into actual adjustments, color temperature shifts, split toning, and contrast changes applied directly to your footage.
What You Need Before You Start
You don’t need any color theory background for this, but a few things make the result noticeably better:
- Footage that’s reasonably well exposed to start with; AI grading shapes a look, it doesn’t rescue badly under or overexposed footage on its own
- A clear sense of the mood or feeling you want, even in plain language, “warmer and more nostalgic” gives the agent far more to work with than “make it look nicer”
- A reference image, if you have one, a still from another video, a photo, even a color palette, since the agent can interpret a reference’s color, warmth, and contrast directly
Step 1: Open invideo editor and Upload Your Footage
Open invideo editor directly in your browser, no install required.
- Open your project in the timeline editor and bring your raw clips into the media panel
- If you already have a specific look in mind, add a reference image now; a still from another video, a photo, or a color palette works
- If you’re working from a preset look, you can also import a .cube or PNG LUT at this stage to use as your starting point
Step 2: Select the Shot (or Shots) You Want to Grade
Open the color workspace and choose exactly what the grade should apply to before you give any instructions.
- Click into a single shot if only that section needs a specific look
- Select multiple clips together if you want one consistent grade applied across all of them at once
- Keep in mind you can always come back and grade additional shots separately afterward, this step doesn’t lock you into one choice for the whole project
Step 3: Describe the Mood, Not the Technical Settings
This is the step that actually replaces manual grading. Instead of thinking in terms of temperature values or curve points, type a plain-language instruction to invideo editor’s AI color grading agent describing the feeling you want the footage to evoke. A few concrete examples:
- “Soften the contrast and give it a warmer, more nostalgic feel”
- “Cooler overall tone, more suspenseful, slightly desaturated”
- “Golden hour warmth, gentle highlights, nothing too harsh”
Send that instruction to the agent along with the shot or shots you selected in Step 2. If you added a reference image in Step 1, mention that here too, tell the agent to match the reference’s warmth and contrast, and it will use that image as its guide rather than only your written description.
Step 4: Review the Result and Refine With Follow-Up Prompts
Play back the graded footage once the agent finishes. Almost no first result is exactly right, and that’s normal, the next step is refining it, not starting over.
- Give a specific, single follow-up instruction: “a little brighter in the midtones,” “cooler, this still feels too warm,” or “keep the mood but bring the contrast down slightly”
- Send one adjustment at a time rather than stacking several requests together, it’s easier to judge what actually changed
- Repeat this review-and-refine loop as many times as you need, each round revises the existing grade rather than regenerating it from scratch
Step 5: Switch to Manual Controls If You Want More Precision
Once the AI grade is close, the full manual toolset sits directly underneath it. Nothing about using text prompts locks you out of hands-on control:
- Lift, Gamma, Gain, and Global wheels, each with its own saturation control, for shadows, midtones, highlights, and the overall image
- RGB and luminance curves, plus hue-vs-hue, hue-vs-saturation, hue-vs-luminance, and saturation-based curves for targeted adjustments
- HSL qualifiers and masks (circle, rectangle, gradient) to isolate a specific color or region of the frame
- Waveform, RGB parade, vectorscope, and histogram scopes to check your grade objectively rather than by eye alone
- Custom LUT import (.cube or PNG) with an adjustable strength slider if you want to blend a preset look with your AI-generated grade
Read This: Why “AI Slop” Is the Real Risk in Online Video Editing Right Now
Step 6: Carry the Grade to Other Shots and Export
Once you’re happy with a look, apply it consistently rather than rebuilding it shot by shot.
- Copy the finished grade from the color workspace and paste it onto another clip, or ask the agent to apply it for you
- Adjust each shot individually afterward for differences in lighting or exposure, a copied grade is a starting point, not always a perfect match
- Export once every shot you care about has been reviewed, not just the first one you graded
Prompting Tips for a Better First Result
A few patterns that tend to produce a stronger starting grade:
- Describe an emotion or atmosphere, not just a color, “tense and cold” gives the agent more to work with than “more blue”
- Mention what to avoid alongside what you want, “warmer, but don’t crush the shadows” heads off a common overcorrection
- If you’re using a reference image, say what you like about it specifically, the overall warmth, the contrast level, the shadow tone, rather than just attaching it with no context
- Ask for one change at a time during refinement rather than stacking several requests together
Key Takeaways
- Text-prompt color grading handles the creative layer, mood and tone, on top of technical color correction, which stays a separate, more mechanical fix
- Describing an emotion or atmosphere gets better results than describing technical settings you may not fully understand yet
- A reference image is optional but gives the agent a clearer target than a text description alone
- Every AI-generated grade in invideo editor lands on editable footage, not a locked result, so manual wheels, curves, and scopes are always available afterward
- Refining a grade through follow-up prompts adjusts the existing result rather than starting over each time
- A finished grade can be copied to other shots rather than rebuilt from scratch, then adjusted individually for lighting differences
FAQs
Do I need to know color theory to use AI color grading?
No. Describing the mood or feeling you want, warmer, cooler, more nostalgic, more dramatic, is enough for the agent to produce a working first grade. Color theory becomes useful later if you want to fine-tune the result manually.
What’s the difference between color correction and color grading?
Color correction fixes technical issues like exposure, white balance, and color casts to create a balanced image. Color grading shapes the creative look on top of that, contrast, tone, and color choices that create a specific mood. invideo editor’s AI color grading tools handle the creative layer specifically.
Can I use a reference image instead of describing the look in words?
Yes. The agent can interpret a reference image’s color, warmth, and contrast and apply a similar treatment to your footage, adjustable afterward with LUT strength and manual color controls.
Will AI grading work if my footage is poorly lit or exposed?
It can help, but it’s not a full fix for badly under or overexposed footage. Starting with reasonably well-exposed footage gives text-prompt grading noticeably better results.
Can I apply a different grade to just one shot instead of the whole video?
Yes. Select the specific shot before giving your instruction, and the agent grades just that section without regrading the rest of the sequence.
What if I don’t like the AI’s first attempt at the grade?
Give it a follow-up instruction in the same plain language, brighter midtones, cooler tone, less contrast, and it revises the existing grade rather than starting over. You can also switch to manual wheels and curves at any point if you’d rather fine-tune it yourself.
Conclusion
The real shift with text-prompt color grading isn’t that it replaces a colorist’s eye, it’s that it removes the barrier of needing to already understand wheels and curves before you can get a usable first grade. Once you have that starting point, the same manual tools professional colorists rely on are sitting right underneath it. So the next time you’re staring at raw footage wondering where to even start with the grade, what mood are you actually trying to put on screen?
Author : Steve Smith is a technology and digital content writer who covers practical software, online tools, and emerging technologies. He focuses on creating clear, useful guides that help beginners and everyday users understand software, choose the right tools, and get more from their digital workflow. Steve’s work combines hands-on research with straightforward explanations, making complex technology easier to understand and use.